Mission set preview screen
This topic provides an overview of the Mission set preview screen and all the settings and buttons on it.
The Mission set preview screen allows you to view the mission results in a summary format. What is displayed on this screen depends on the mission sets you selected in your case as shown in the examples below.
-
This graphic shows a case where all the mission sets were selected and there is a separate tab for each one:

-
Typical results displayed for the Case Builder (Location Analysis or Crime Scene Analysis) mission set:

-
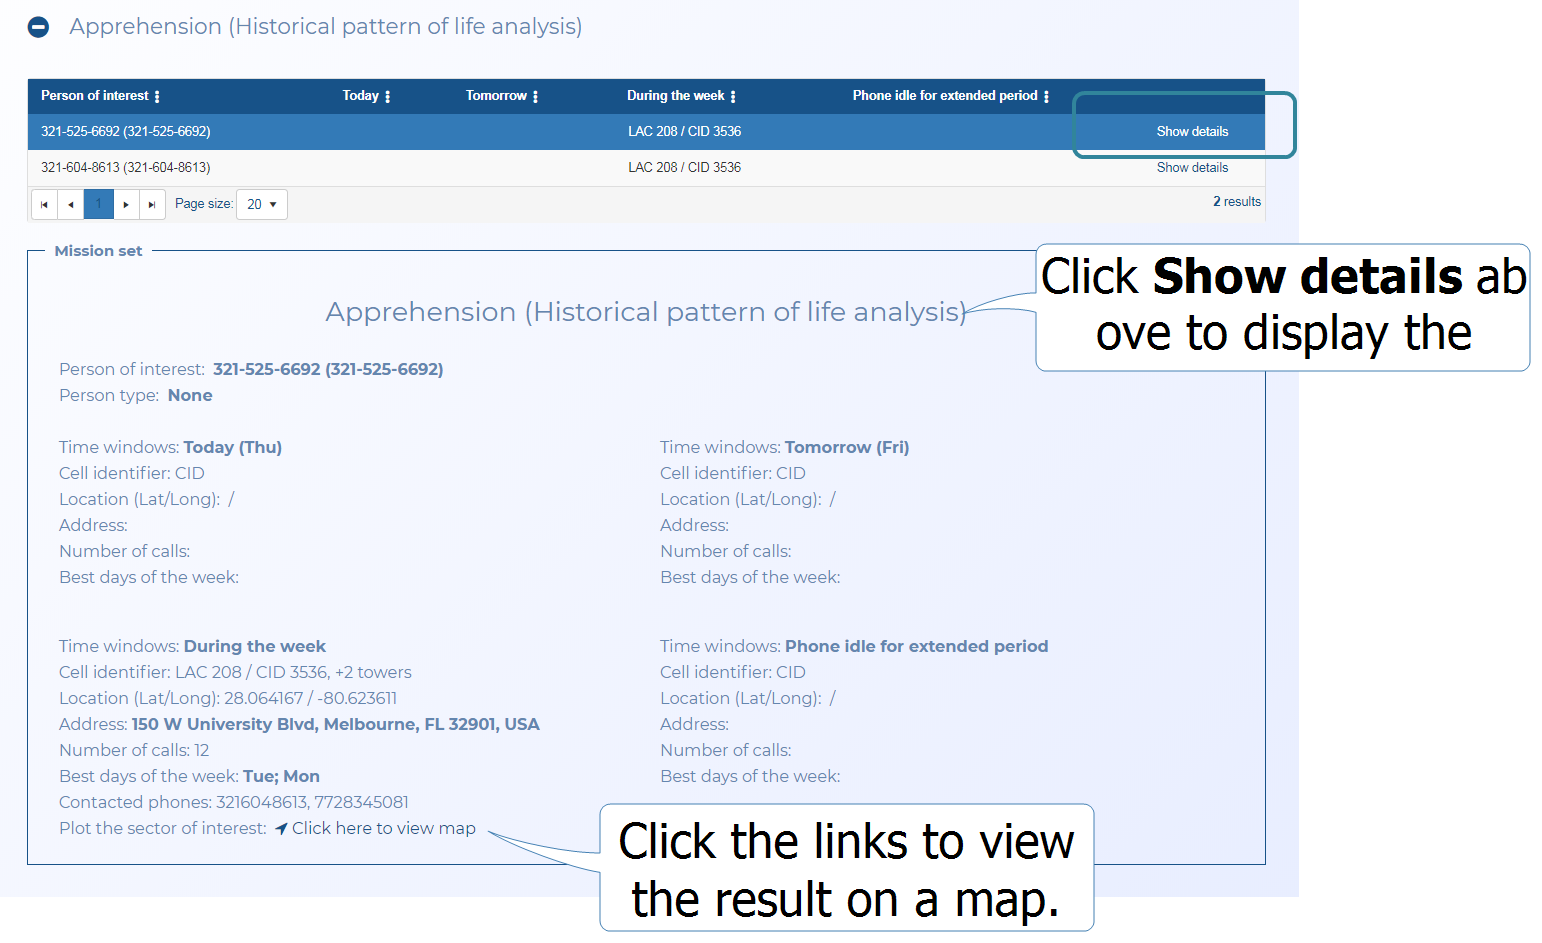
Typical results displayed for the Apprehension (Historical pattern of life analysis) mission set:
-
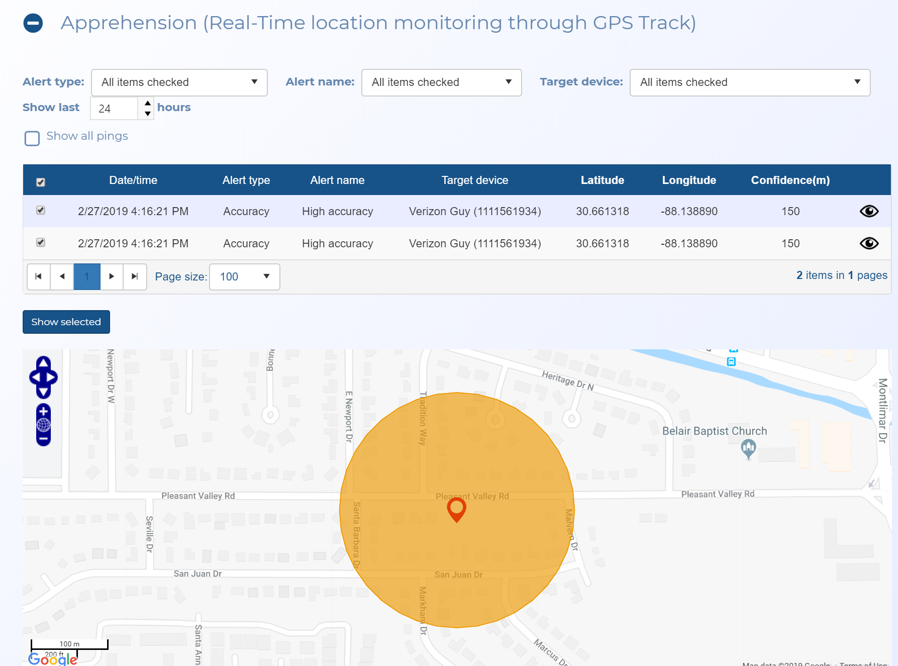
Typical results displayed for the Apprehension (Real-Time location monitoring through GPS Track) mission set:
Click to view further details of the result of the mission set for each row in the table.
This link appears for some of the preview results. Click to view the selected result on the IQ packet sector map screen.
 Column header menu
You can select which results and how the results are displayed in the table and filter the results further using at the top of each column which expands the column header menu. You can also click the column title to sort the results.
Right-click on any column header to display this menu.
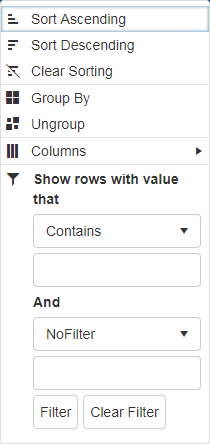
This menu allows you to perform the following:
- Sort ascending: click to sort the column text from A to Z or to sort numbers from smallest to largest.
- Sort descending: click to sort the column text from Z to A or to sort numbers from largest to smallest.
- Clear sorting: click to clear any sorting you have applied using Sort ascending or Sort descending.
- Group by: click to group the cases by the selected column.
- Ungroup: click to ungroup the cases by the selected column.
-
Columns: select to display a list of which columns you can display on this table.
-
 : use to filter further the results that are displayed in the table. You can filter based on the settings in that column and/or values that occur across the case row. When a filter is applied to a column the column header appears in colored italics.
 - Use the check-boxes if any are displayed for your selected column. These allow you to filter based on all the settings that are applicable to that column. For example, the Status column allows you to filter by the different statuses for example, open and closed.
- Set up to two values that you can filter for using the drop-downs and the data entry field. For example, you could select "Contains" the value "Florida" to search for cases that contain the word "Florida" in the settings displayed in the table.
- Click Filter when you have entered the required filter information.
- Click Clear filter to remove any filter from the column.
Select if you want to filter the displayed alerts by their type.
Select if you want to filter the displayed alerts by the name you gave them in Alert name on the Smart Track alerts & notifications screen.
Select if you want to filter the displayed alerts by specific phones or vehicles.
Select the number of hours of data you want displayed.
Select to display all the GPS pings in the table alongside the alerts. In the table these are easily identified by the lack of an alert type, alert name and  . To ensure they are also displayed on the map they must be selected.
This displays all the available alerts and GPS pings that match the criteria you have selected in the filters.
Click to display on the map the selected triggered alerts and GPS pings.
Click to return to the Manage case screen.
Click to return to the previous step in the wizard.